


Building a solid shed base is essential for ensuring your shed stands strong and lasts for years. A well-constructed base keeps your shed off the ground, protecting it from moisture and pests. In this ultimate guide, we will cover how to build a shed base on a budget, including options like concrete bases and paving slabs. Let’s get started!
Why a Good Shed Base Matters?
A solid shed base is essential for maintaining the integrity of your shed and ensuring it functions properly over time. It offers critical benefits, including:
- Stability: A level base prevents your shed from shifting or settling over time, ensuring it remains upright and functional.
- Protection: Raising the shed off the ground guards against moisture, rot, and pests, significantly prolonging its life and reducing the risk of damage.
- Longevity: Investing in a good base minimizes repair costs, ultimately saving you money on maintenance and enhancing the overall durability of your shed.
Choosing the Right Type of Shed Base
When deciding on a shed base, you need to take into account various factors. Therefore, consider your budget and the materials available. Here are three popular options:
- Concrete Shed Base
- Paving Slabs
- Gravel or Timber Frame
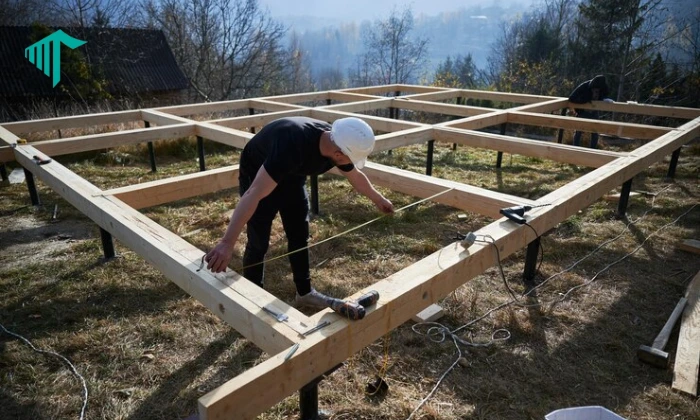
How to Build a Concrete Shed Base?

Building a concrete shed base may seem a difficult task for you. However, it is an easy job which you can do without asking for further assistance Here’s how to do it:
Materials Needed
- Concrete mix: A pre-made mixture of cement, sand, and aggregate that hardens to form a durable foundation.
- Rebar or mesh for reinforcement: Steel bars or mesh that provide added strength and support to the concrete, preventing cracking.
- Wood for formwork: Wooden boards used to create a mold that shapes the concrete until it sets.
- · A level: A tool that ensures the surface of the base is perfectly flat and even for stability.
- A shovel and a trowel: A shovel is used for digging and moving materials, while a trowel is used for smoothing the surface of the concrete.
- A wheelbarrow: A wheeled container that helps transport heavy materials like concrete mix and tools easily around the worksite.
Step-by-Step Instructions
Here are the instructions for a better understanding
- Choose a Location: Find a flat area in your yard that’s easily accessible. Ensure there are no roots, rocks, or debris.
- Measure and Mark: Use stakes and string to outline the dimensions of your shed base. Make sure it’s slightly larger than your shed.
- Excavate the Area: Dig out the marked area to a depth of about 4-6 inches. Level the ground as much as possible.
- Create Formwork: Use wood to create a rectangular frame around the dug-out area. Secure it with stakes.
- Add Reinforcement: Place rebar or mesh inside the form to strengthen the concrete.
- Mix the Concrete: Follow the instructions on the concrete mix. Use a wheelbarrow for easy transport.
- Pour the Concrete: Pour the concrete into the form, filling it evenly. Use a trowel to smooth the surface.
- Cure the Concrete: Allow the concrete to cure for at least 24-48 hours before removing the formwork.
- Check Level: Use a level to ensure the base is flat before placing your shed on top.
How to Build a Shed Base with Paving Slabs?
If you’re looking for a budget-friendly option, a base made of paving slabs can be a great choice. Here’s how to do it:
Materials Needed
- Paving slabs
- Sand or gravel
- A level
- A rubber mallet
- A shovel
Step-by-Step Instructions
- Select the Location: Choose a flat area that receives adequate drainage.
- Measure and Mark: Mark the area for your base, similar to the concrete method.
- Excavate and Level: Dig about 3-4 inches deep and level the ground.
- Add a Base Layer: Spread a layer of sand or gravel (about 2 inches thick) to help with drainage.
- Lay the Paving Slabs: Start laying the slabs in the corner and work your way out. Use a rubber mallet to tap them into place and ensure they are level.
- Fill Gaps: Once all slabs are laid, fill in the gaps with sand or gravel to secure them further.
- Check for Level: Ensure the slabs are even before placing your shed on top.
Cheapest Shed Base Options
If you’re on a tight budget, consider these options:
- Gravel Base: Dig out a 3-4 inch layer and fill it with gravel. This provides good drainage and is easy to install.
- Timber Frame: Construct a frame using treated timber, fill it with gravel, and lay your shed on top. This is a simple, affordable solution.
Tips for a Successful Shed Base
- Plan for Drainage: Make sure your shed base allows water to drain away to prevent flooding.
- Use Quality Materials: Whether using concrete or paving slabs, ensure they are of good quality to enhance durability.
- Allow for Settling: If using gravel or a timber frame, allow for settling by checking the level periodically as you work.
Conclusion
Building a shed base is a crucial step in setting up your shed. Whether you choose a concrete fence post, shed base, paving slabs, or another budget-friendly option, following the steps outlined in this guide will help you create a solid foundation.With a well-constructed base, your shed will stay dry, safe, and last for years.
FAQs
How long does it take for concrete to cure?
Concrete typically takes 24-48 hours to cure enough for light use but may take up to a week for full strength.
Can I use regular bricks instead of paving slabs?
Yes, regular bricks can be used, but ensure they are level and stable.
How thick should a gravel base be?
A gravel base should be about 3-4 inches thick for optimal drainage and stability.
Is it necessary to check the level of the base?
Yes, ensuring the base is level is essential for the stability and longevity of your shed.
What’s the cheapest shed base option?
A gravel base is often the most affordable and straightforward option for many DIY enthusiasts.